explore the world through the universal language of food
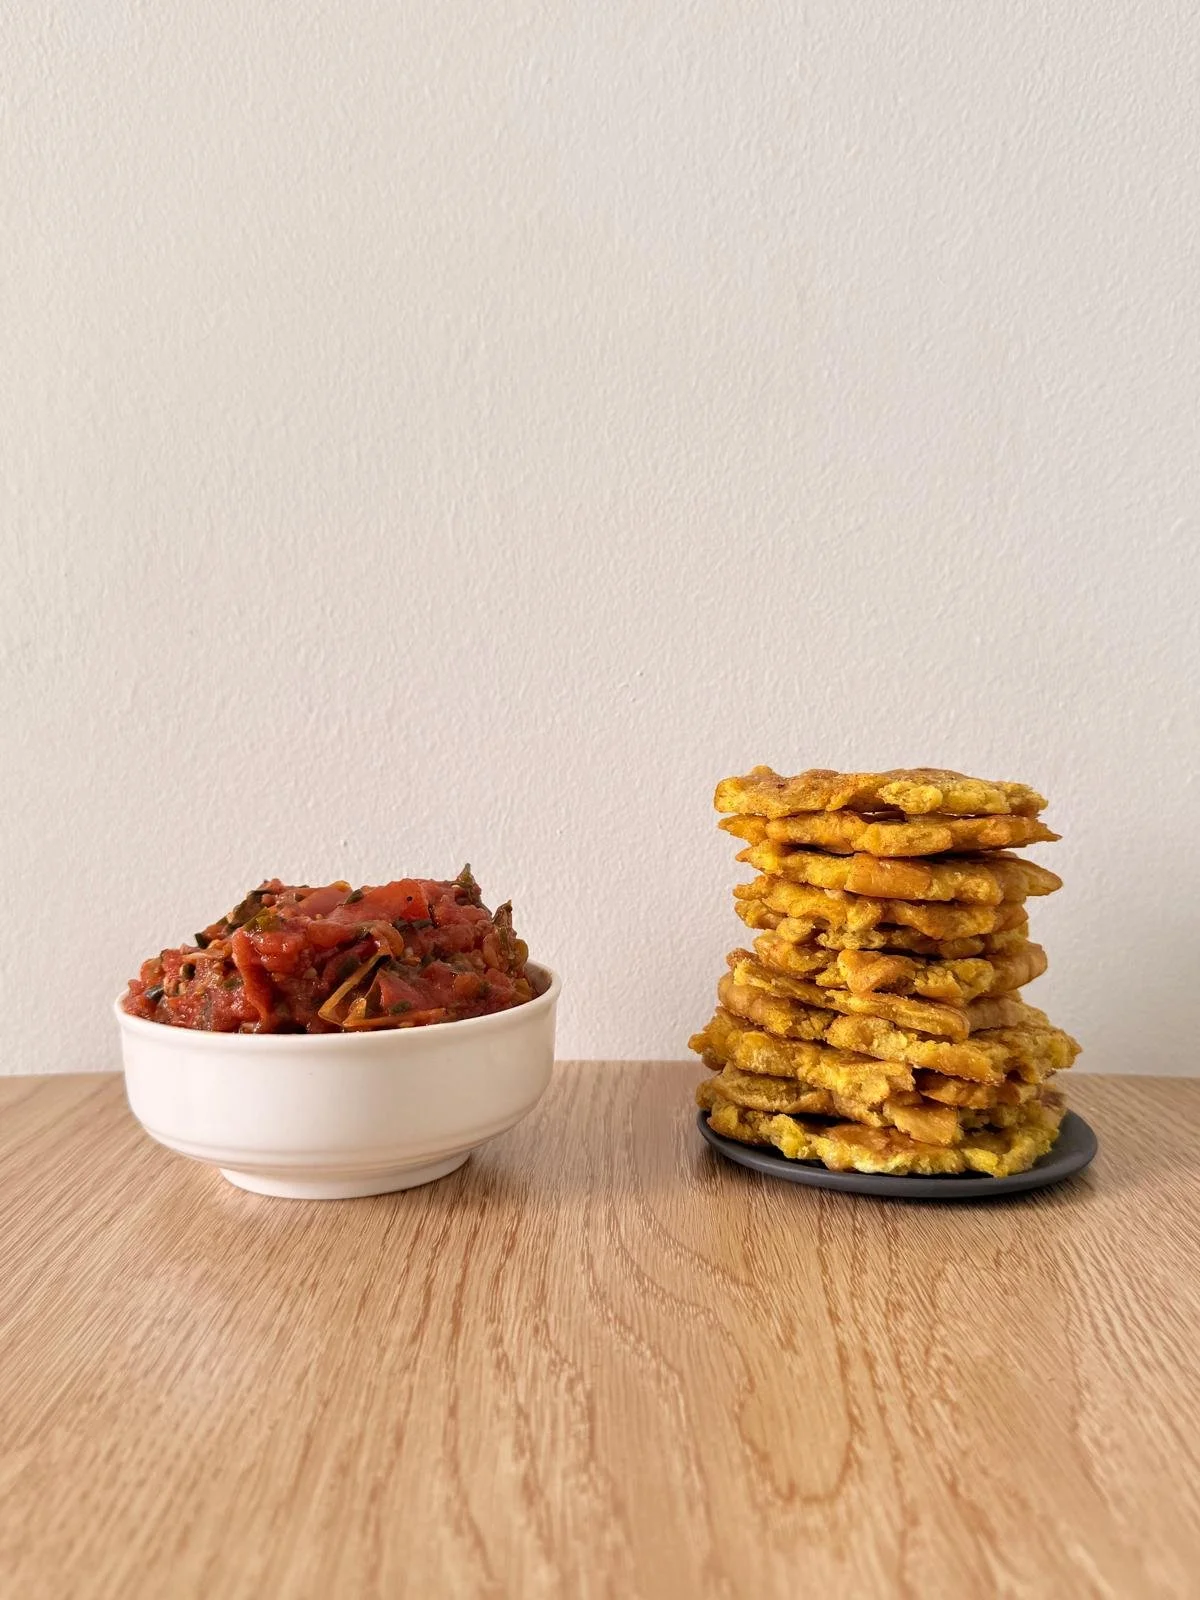
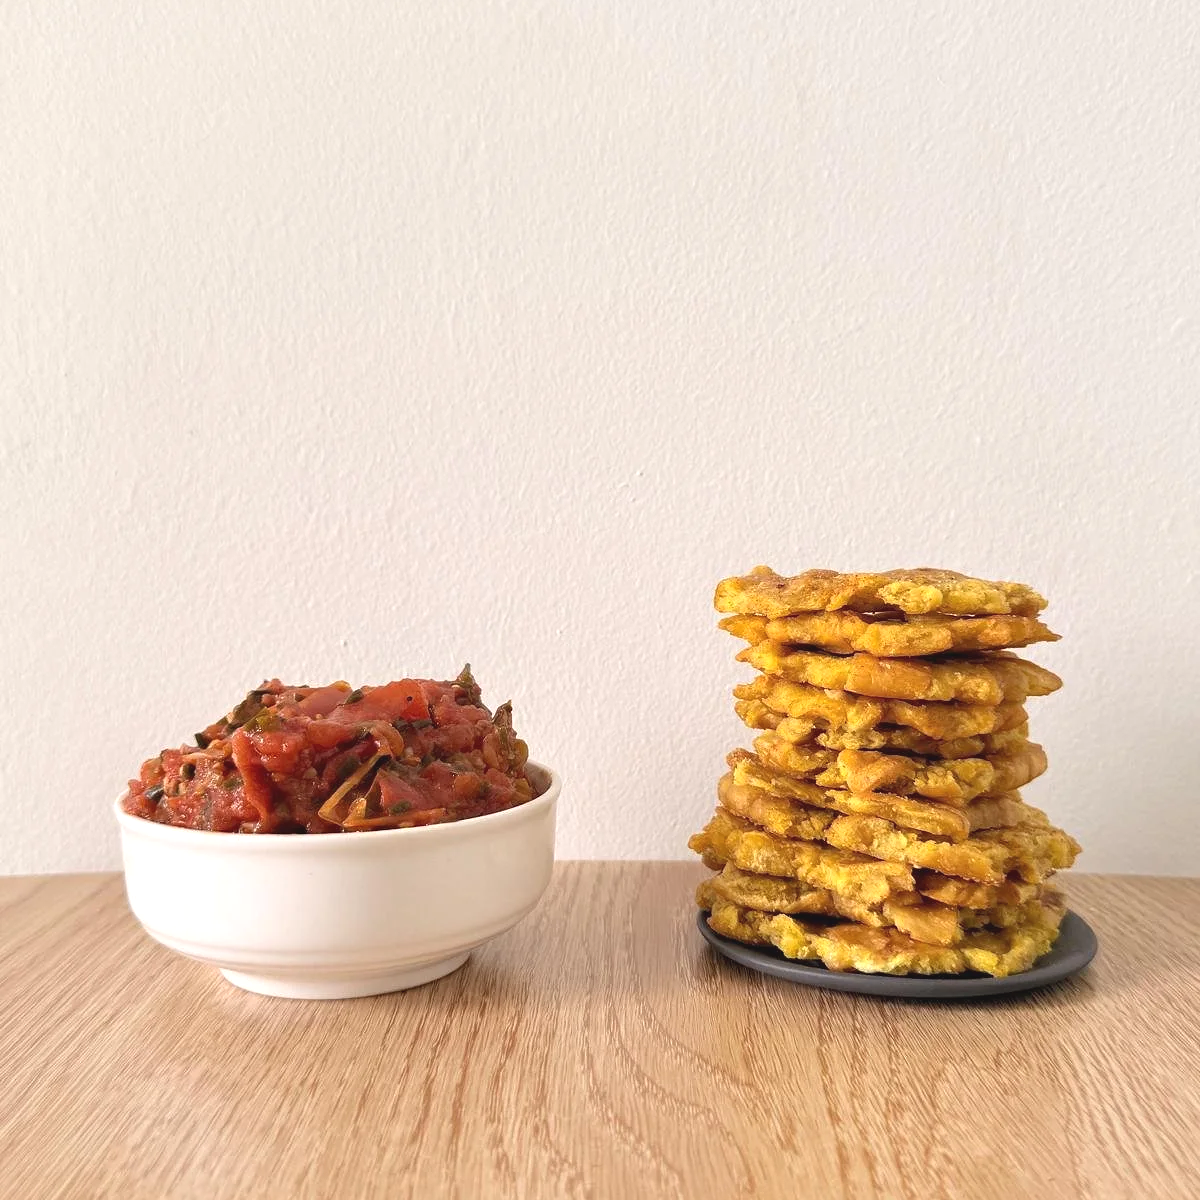
Hogao y Patacones
The Recipe
Serves: 5-6 people
Preparation: 30-40 minutes
Assembly Time: 10 minutes
“A simple but delicious combination that crosses Indigenous traditions and Spanish Colonial ingredients”
This is an unapologetically simple dish focusing on produce with big flavour, and humble preparation - the philosophy that sits at the heart of Colombian cooking.
I guess you could liken hogao to sofrito, which can be found in many variations across Latin America and Europe, yet hogao is distinctively Colombian, in both flavour and purpose.
The base of this dish, tomatoes and onions, became a staple in Colombian kitchens after the Spanish colonisation, yet the sauce is slowly cooked over a low fire until it becomes jammy, an ode to traditional indigenous methods bringing out the best flavours in beautiful produce.
Patacones, ,made with green plantains, are an ode to Colombia’s tropical coast and reflect the influence of African culture on cuisine. Patacones are a staple and are served up alongside fish, soup, meat dishes and even rice.
Whether this dish is served as a snack or a side, the elements within this dish is a reflection of history and connection to the culture and people of Colombia.
INGREDIENTS
INGREDIENTS - HOGAO
500g fresh tomatoes
100g spring onions (finely sliced)
1 clove/8 g finely chopped garlic
1 tsp/6g toasted cumin, ground
1/2 tsp black pepper
1/4 tsp salt
1 red capsicum (if using), finely chopped
2-4 tbsp extra virgin olive oil
Small bunch of coriander as garnish
INGREDIENTS - PATACONES
800g green plantains
1 litre of vegetable oil (for frying)
METHOD
Over a medium heat, cook the spring onions in 2 tbsp. oil until soft, yet still green
Add in the chopped garlic and cook until fragrant
Chop the tomatoes, then add them with salt, pepper, and ground cumin
Add red capsicum here if using
Simmer down all ingredients until jammy, season more to taste
In a medium saucepan, pour in vegetable oil and allow the temperature to rise to about 180’C
Peel and cut plantains into half inch slices.
Fry them in oil and set aside on a paper towel or rack to remove the excess oil.
Place each piece on a chopping board or flat surface and squish with a cup, plate or tortilla press
Fry the plantains again until crispy, and lightly salt while still hot
Serve patacones with the jammy hogao, topped with coriander.
Ready to bake? Try some of these quick and easy recipes..
Chayote Salad with Vanilla Chipotle Dressing
The Recipe
Serves: 10 people
Preparation: 30 minutes
(+2 days)
Assembly Time: 10 minutes
“The chayote crop has archaeologically left very few trails behind, yet the word itself is present in the Otomanguean language (one of the oldest languages in Mesoamerica), and has the greatest number of genetic variations, pointing to its origins around the 12th Century in Southern Mexico.”
Growing up, I was served chayote for dinner, boiled until mushy with a dollop of butter and it was not the tastiest. After living in Mexico, I learnt how important this squash was in Latin America, and the history of its origins runs deep in the region. Chayote is a pear-shaped fruit that is coloured from pale green to emerald and is an extremely diverse ingredient that can be used to make both savoury and sweet dishes.
The chayote crop has left very few traces archaeologically, yet the word itself is present in the Otomanguean language (one of the oldest languages in Mesoamerica), and has the greatest number of genetic variations, pointing to its origins in the 12th Century, Southern Mexico. With the inclusion of this linguistic and agricultural evidence, the Mayan agricultural systems of the 8th Century also show cultivation of similar crops grown in the same way as chayote.
The chayote moved towards the United States in the 18th Century, and then it journeyed towards Europe and Asia. Today, it is heavily cultivated in China and Southeast Asia.
From leaves to roots, to shoots to fruit (whoa, that rhymes), almost all of the chayote plant is edible, and it is highly nutritious, full of fibre, minerals and vitamins, as well as having antioxidant properties.
Whether it is boiled in Caldo de res (Mexico), sauteed with garlic and onion in Chucho refogado (Brazil), or grilled and made into a simple salad such as mine, it gives texture, takes on flavour and is a wonderfully diverse ingredient found in cuisines all around the world.
Below is my chayote salad, it’s super simple so you must try it!
The only key point to this salad is not to overcook the chayote as they will be too mushy to grill.
Enjoy the process and let me know how you go.
INGREDIENTS
INGREDIENTS
400g dried pinto beans (soaked overnight and boiled until cooked)
or 1 can of cooked pinto beans
1 kg chayote, peeled and halved
1kg beetroot
200mls of good ginger beer
40g blended chipotle paste
16g good vanilla extract
100g red wine vinegar
40g caster sugar
10g fine sea salt
110g extra virgin olive oil
coriander and lime to garnish
METHOD
The beetroot needs to be prepared 2 days in advance.
Peel beetroot and slice into 8mm thick slices
Place flat in a bag and pour in ginger beer.
Seal and allow to sit in the fridge for a minimum of 2 daysOnce the beetroot is marinated and cured, cut the beetroot into 1 cm cubes
Peel and halve chayote (it is good to wear gloves as chayote can be quite sticky)
Place chayote in water and bring to a boil (approximately 15 minutes)
Take out chayote and drain completely, chill to firm up
De-seed and take out the coreSprinkle salt and oil on the chayote and grill both sides until nice char marks form. Slice chayote into 5mm thick pieces.
For the dressing, combine chipotle paste, olive oil, sugar, sea salt, red wine and vinegar, set aside
To assemble, simply toss the prepared beetroot, beans, grilled chayote and mix in the dressing.
You can follow the below proportions for a small side salad.
50g beetroot, chopped into 1 cm cubes80g chayote, chopped into half moons
80g pinto beans
30g chipotle dressing
3g coriander
Top with a lime wedge - ENJOY!
Ready to bake? Try some of these quick and easy recipes..
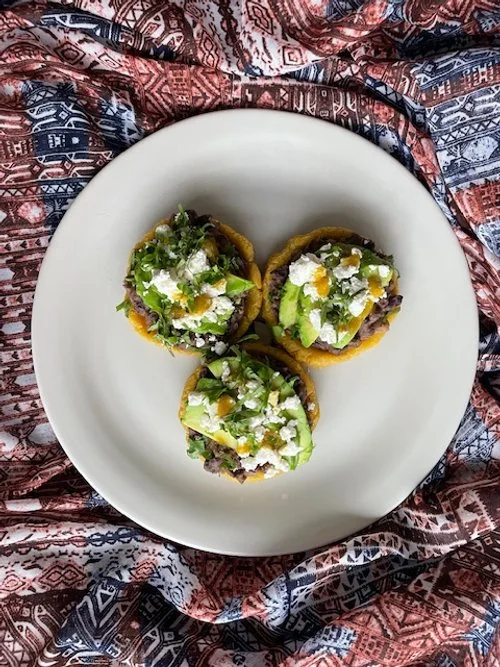
Sopes with Black Beans & Cheese
The Recipe
Serves: 2 people
Preparation: 30 minutes
Assembly Time: 10 minutes
“Sopes are not as common as tacos on the streets of Mexico, however, they are a more robust and portable snack, and just as delicious. ”
One cannot talk about sopes without talking about maize and nixtamilsation. The maize crop was a fundamental element in Aztec societies and remains at the forefront of Mexican cuisine. Before colonisation, maize was processed by a method known as nixtamalisation, not only did treating the corn with an alkaline solution (lime water). give it a unique taste, it also enhanced the nutritional content of the maize (specifically niacin), which was key to preventing pellagra.
The Aztecs prepared maize in many different forms, and the most common form that is used today is masa harina. It is a glorious ingredient that can be made from a myriad of corn types and is transformed into cakes, tortillas, gorditas, tamales, champurrado and also, of course, sopes.
Sopes are a much thicker version of a tortilla and are reasonably small in size (5-10cm), they have a ‘lip’ to hold ingredients that are layered on top of them, which range from beans, shredded pork, chicken, cheese, avocado, herbs and hot sauce.
They are not as common as tacos on the streets of Mexico, however, they are a more robust and portable snack, and just as delicious.
Masa harina (dough flour) is the base of sopes, which then has water added to it to create the dough. The dough is pressed, dry-fried, shaped and fried. There is no need to add salt or herbs to sopes. As simple as the base may seem, the process of nixtamilsation gives the corn an earthy and slightly tangy flavour profile.
INGREDIENTS
SOPES
170g masa harina
300g (or less) of warm water
100g olive oil
TOPPINGS
80g/1/2 brown onion
400g black beans (cooked)
1.5 tsp toasted cumin powder
1/2 tsp smoked paprika
1/2 tsp sea salt
1 medium avocado, sliced
100g crumbled queso fresco OR Danish ‘feta cheese’
15g chopped coriander
hot sauce
METHOD
Finely dice the onion and cook until soft in a medium-heat fry pan with a good pour of extra virgin olive oil (you can also use butter or pork fat)
Add in beans and cook until soft, add about 20-50mls of water and smash the beans with a fork so they form a chunky paste (you can smash them more if you prefer a smoother texture, heck, blend them if you like!)
Add in cumin, smoked paprika and salt
Mix until combined, add more spices to taste
Take off the heat and start to make the sopes.
Mix water and masa harina to form a dough. It should not be too sticky and malleable
Roll into 50g size balls and place between two baking sheets, plastic or in a tortilla press.
Gently press until the disc is around 1cm thick and 8cm wide. RepeatIn a cast iron pan, heat on medium, and dry fry the discs, they can be slightly brown on each side
While they are still warm, pinch the edges to create a ‘lip’ around the outside of the discs
Heat the oil in a pan on a medium-high heat and cook the sopes on each side until crispy
Set aside and top with bean mixture, sliced avocado, cheese, coriander and hot sauce
Indulge in the simple delights of Sopes… and you can read more about it HERE.
Questions? Comments? Let me know, I’d love to hear from you.
Buen Provecho!
Ready to bake? Try some of these quick and easy recipes..
Some of my favourite Mexican Cooking Resources & Ingredients
Jicama & Apple Salad
The Recipe
Serves: 2 people
Preparation: 10 minutes
Assembly Time:1 minute!
“From its glorious origins in Mexico, Central and South America, Jicama made the long journey to Asia in the 17th Century”
Amongst the plethora of street stalls in Mexico City, I remember the fruit carts that were neatly prepared, and too irresistible to walk past without purchasing a cup of jicama, mango, or papaya sprinkled with chilli, salt, and a squirt of juicy Mexican lime. This was not the first time I had eaten jicama, but it was the first time I had seen it served in this way – cut like thick fries and eaten raw.
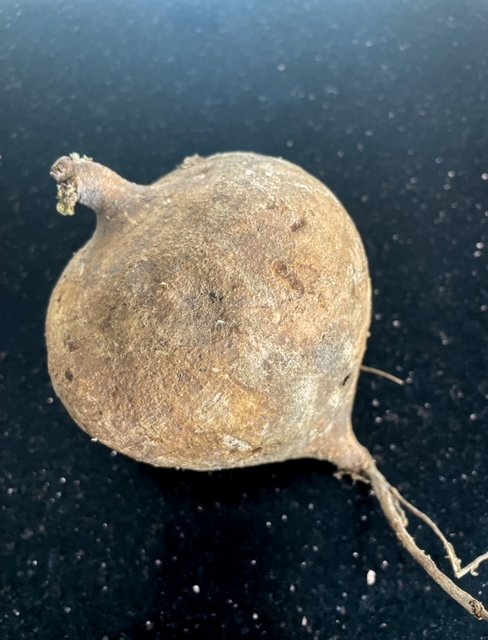
Although Jicama looks like a root vegetable, it is the root of a pea plant (Fabaceae family) that spouts out from the top of it. The crispy and juicy Mexican turnip, Jicama (pronounced “Hee Ka Ma”) is derived from the Nahuatl word xīcamatl.
Where is Jicama from?
The origins of this vegetable lie in Mexico, Central and South America and it is known to be one of the oldest cultivated crops – even the Mayans munched on it back in the day. There have been traces of Jicama found in archaeological sites in Peru that date back around 3000 years.
Jicama most probably journeyed from the Americas to Asia with the help of the Spaniards. It is now a common ingredient found all over the world and is a popular element in dishes from popiah in Singapore to rojak in Indonesia.
What does Jicama Look Like?
With a rustic exterior, Jicama has fibrous skin yet a fleshy interior. It is made up of around 90% water and it has a glorious ability to absorb flavours ever so well.
What does Jicama Taste Like?
If you haven’t tried jicama, you will be pleasantly surprised. With its deceiving root vegetable costume, it is not at all starchy, yet has a juicy texture similar to a nashi pear with a little bit more structure. It can be eaten raw or cooked and thrown into savoury and sweet dishes.
Enough of the history lesson, here’s the recipe.
INGREDIENTS
Salad
280g jicama
60g / half red apple
30g water celery or watercress (rocket works too!)
1 tbsp / 10g raisins
1 tbsp / 5g pumpkin seeds
Dressing
1.5 tbsp lime juice
½ tsp pepper
¼ tsp salt
2-3 tbsp extra virgin olive oil
1 tbsp habanero hot sauce (or any sauce you wish)
METHOD
Wash jicama, red apple, and water celery/watercress.
Trim the thick stalks of the water celery and save later for a veggie stock.
Peel jicama and cut into 1cm thick sticks
Keep the peel on the red apple and slice it a little thinner than the jicama
Mix the salt and pepper in the lime juice and mix until the salt has slightly dissolved, add in hot sauce and olive oil.
Mix until all dressing ingredients are combined.
Place the dressing, apple, and jicama in a bowl and mix to thoroughly coat them, allow to sit for a minute or two.
On a plate, place half the jicama/apple mixture and then add some of the water celery.
Pile the rest of the jicama and apple and then the watercress. Arrange as you wish!
From a reasonable height, flutter the pumpkin seeds and raisins down on the salad.
Add a small amount of the remaining dressing to finish.
Enjoy the crunchy and fresh simplicity of this healthy salad.
For extra oomph, feel free to add some crumbled fetta cheese.
Questions? Comments? Let me know, I’d love to hear from you.
Buen Provecho!
Try some mains to go with this Jicama Salad!
Gochujang Felafels with Garlic Sauce & Crunchy Cabbage Salad
The Recipe
Serves: 4-6 people
Preparation: 30 minutes
Cooking Time: 15 minutes
“Felafels are known to be of Egyption origins, yet every country seems to put their own spin on this delicious heart snack. Pair it with good toppings and you have a match made in heaven.”
Inspired by my article on Jang and the wonderful world of Korean sauces, I came up with this far-from-traditional Korean dish. If you know me I love both Middle Eastern and Mediterranean food. I used a readily available Jang - Gochujang to come up with these pita pockets to show that Korean sauces go way beyond soups and marinades.
Make the felafels in advance or freeze them if you wish!
THE INGREDIENTS
Felafels
2 x 250g canned chickpeas
3 tbs generous tbsp gochujang
2 tsp minced garlic
120g/1 medium onion, finely chopped
3 tsp sesame oil
4 tbsp gangjang/soy sauce
3 tbsp rice wine vinegar
160g plain flour
Salt to taste
Handful of chopped coriander
Handful of chopped spring onions
Fine sea salt
Vegetable oil for deep frying
Yoghurt Garlic Sauce
240g good thick Greek yoghurt
2 tbsp lemon juice
2 cloves of finely crushed garlic
Salt to taste
Combine all ingredients, taste and adjust
seasoning
Allow to sit in the refrigerator until ready to serve
Cabbage Salad
½ small purple cabbage
1 x nashi pear (or green apple) sliced into matchsticks
2 tbsp sesame oil
¼ cup chopped coriander leaves
¼ cup finely chopped green onions
Sea salt to taste
Mix all ingredients just before serving. Add more oil or salt if needed.
10 x pita bread pockets*
THE METHOD
Drain the chickpeas (you can reserve the aquafaba which works as a great vegan substitute for egg white)
Place the chickpeas, garlic, onion, gochujang, sesame oil and rice wine vinegar in a food processor
Blend until the mixture is well incorporated and smooth
Add in the plain flour in three parts (you may add more if needed). The flour binds the ingredients enabling the felafels to be shaped and fried easily
Lightly blend in the coriander and mix the spring onions by hand. Taste the mixture and add some fine sea salt if needed
Allow to set in the fridge slightly while you make the garlic sauce and cabbage salad
In a medium saucepan, heat the vegetable oil and prepare to fry the felafels. The oil will be ready if you sprinkle a bit of flour or the falafel mixture in and it sizzles right away. When frying, watch the oil carefully as the felafels will brown quickly. After frying, take out the felafels and place on a paper towel.
You are welcome to pop the felafels in the oven (1bout 180’C for 10-12 minutes) after drizzling them with olive oil, however, they won’t obtain a crispy texture
Assembly; Cut the pita bread in half and slice to create and opening.
Place the cabbage salad in the half pitas and add the felafels, drizzle with yoghurt sauce and top with sesame seeds.
*you can buy the pita pockets or make your own HERE
TRY SOME JAM & SPREAD RECIPES
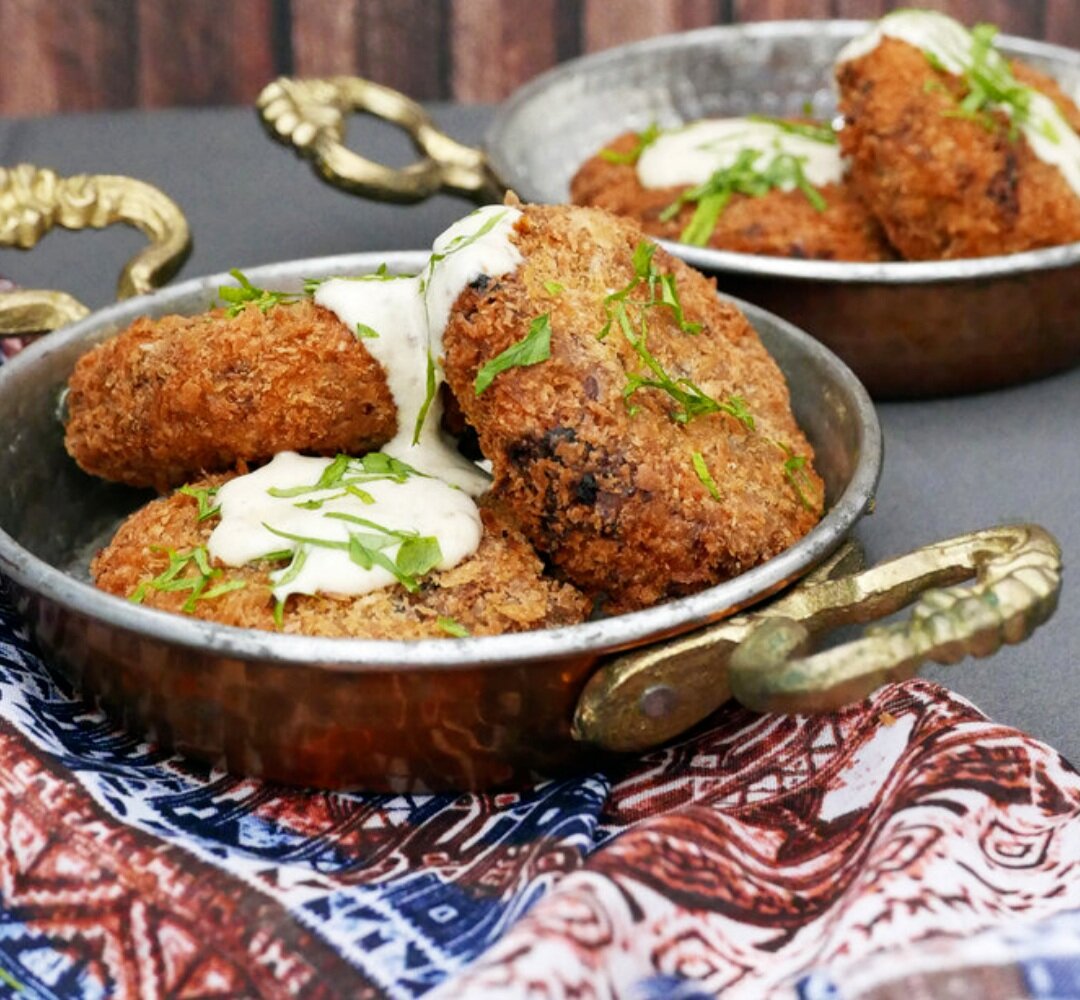
Lentil Croquettes
The Recipe
Serves: 4-6 people
Preparation: 35 minutes
Cooking Time: 20 minutes
Croquettes quickly became popular in France and spread to other countries, including Spain, where they are known as "croquetas," and the Netherlands, where they are called "kroketten." Today, croquettes are enjoyed all over the world, with many variations in their fillings and coatings.
Croquettes, a wonderful French invention was developed to use leftover ingredients such as meat or cheese.
It contains a binder such as flour or potatoes and is then coated in bread crumbs and fried until golden and crispy.
Lentils and potatoes - such a hearty snack, dressed in a tangy raita or tahini sauce, how can you resist?
This recipe has a few steps but is pretty simple and can be made in bulk and frozen for later… if you don’t gobble them up at once!
THE INGREDIENTS
340g green lentils
3 bay leaves
2 clove garlic
120g onions, finely chopped
500g high starch potatoes such as Russet
4tsp chilli powder
4-5 tbsp roasted curry powder
2.5 tsp coriander powder
2.5 tsp ginger powder
2-3 tsp fine sea salt
20g chopped coriander
2 lemon zest
4-5 tbsp flour
Sunflower oil for frying
Coating
200g plain flour
300g panko crumbs
2 eggs
Have the eggs, panko and flour all in separate bowls.
THE METHOD
Cook the lentils in water with bay leaves and garlic until tender, strain and remove the garlic and leaves.
Peel and cut the potatoes into quarters, boil in salted water until crumbly.
Strain the water, mash the potatoes in a large bowl.
Fry off the chopped onion until translucent. Place into the bowl with the mashed potatoes
Stir in salt, spices, zest and lentils until thoroughly combined. Lastly add flour to bind the mixture
Shape the potato/lentil mix into medium sized patties (60g).
Place the patties on cling film and place them in the fridge to allow them to firm up and hold shape (overnight is ideal)
Dip the patties into the flour, then eggs and then panko
Fry until golden
Place onto a paper towel to drain off the excess oil
Serve warm with tahini sauce, raita and lemon wedges
TRY OUT SOME MAIN RECIPES BELOW
Nori Salt Popcorn
The Recipe
Serves: 2 people
Preparation: 5 minutes
Cooking Time: 10-15 minutes
From the invention of the first popcorn machine by Charles Cretor in the 1890s, popcorn became a more accessible snack, where kernels could be popped from a cart by the heat of a gas burner. It was a tasty snack that was both fresh and affordable.
There’s something super comforting about curling up with a big bowl of popcorn, wearing a pair of comfy pants and sitting down to a movie or two. It’s synonymous – popcorn and films, but it wasn’t always that way.
Teosinte was the first corn plant
We could travel back to the beginning – back to over 10,000 years ago in Mexico, where corn was domesticated from teosinte, a Mexican grass with almost no physical resemblance to corn we know of today, yet it had a similar chromosome structure.
What is the difference between popcorn and sweet corn?
Popcorn and sweet corn are two different types of corn plants that should not be confused with one another. A popcorn plant is only one particular strain known as Zae mays everta that is sown and grown in nitrogen rich soil. It is then dried out completely by the sun and is only harvested when the ears have turned brown and the kernels consist of about 16% moisture. Through processing of the kernel by means of storage and then stripping the kernels from the head, the final result is around a 14% moisture content within the kernel and a hard-outer layer that is ready for some popping.
Recent studies have found that Peruvians were enjoying popcorn as a snack around 6,700 years ago. Despite the lack of kitchenware or pots to cook it in, they were roasting it over an open fire until the kernels burst and billowed out a white mushroom looking interior.
Teosinte
Credit; Matt Lavin, CC BY SA 2.0 (eos.org)
Recent studies have found that Peruvians were enjoying popcorn as a snack around 6,700 years ago. Despite the lack of kitchenware or pots to cook it in, they were roasting it over an open fire until the kernels burst and billowed out a white mushroom looking interior.
If we fast forward to the 1800s, popcorn was a common snack at outdoor fairs and carnivals, however it did take some time before it moved into the movie theatres. At these outdoor events, popcorn was made in wire baskets over open fires. Opera, theatre and the cinemas were known as more upmarket venues and popcorn took some time to find its way into the foyers of these venues.
From the invention of the first popcorn machine by Charles Cretor in the 1890s, popcorn became a more accessible snack, where kernels could be popped from a cart by the heat of a gas burner. Despite vendors not being allowed into the cinemas with their popcorn carts, they were extremely popular as movie goers would purchase their bag of popcorn before watching the movie. It was a tasty snack that was both fresh and affordable.
Popcorn Cart, 1900s
Credit: www.mypopcornkitchen.com
The United States succumbed to the Great Depression in the 1930s and taxes were high on candy and soda, allowing popcorn to be a more affordable yet still indulgent treat at the cinema. Popcorn became identified as the most popular snack to have at the movie theatres which led to the development of many types of flavoured popcorn recipes, both sweet and savoury.
From Christmas tree decorations, to bottomless bowls of the white, fluffy, crunchy stuff in cocktail bars to giant boxes in the cinema that are never finished, popcorn has had quite the history but it is definitely a snack that is loved by all and is here to stay.
Here’s a simple, umami packed snack that is just for that latest Netflix series or movie you are going to watch tonight.
THE INGREDIENTS
POPCORN
2-3 tbsp vegetable oil
1 tsp salt
85g popcorn kernels
NORI SALT
10g dried shiitake mushrooms
10g smoked sea salt flakes
15g roasted nori/seaweed
THE METHOD
Popcorn
In a large heavy based saucepan, throw in the oil, salt and corn kernels
Stand by with a lid before the popping begins
Over a medium-heat, while the oil is heating up, place the lid on the saucepan and move in a circular motion ensuring all the kernels are covered in salt and oil.
As the popping begins, keep the circular motion of the saucepan with lid held firmly in place. When the popping stops, take off the heat and place in a large bowl that will nestle nicely upon your lap. Sprinkle generously with the nori salt, put your feet up, turn on that Netflix and crunch away to your hearts content.
Nori Salt
Blend the shiitake mushrooms to a fine powder and sieve to remove any large pieces. Aside.
Blend the salt to a coarse grind and the seaweed slightly finer
It’s good to blend the ingredients separately as they are different textures to begin with.
Mix all the blended ingredients together and store in a sealed glass jar.
TRY SOME MAIN DISHES HERE
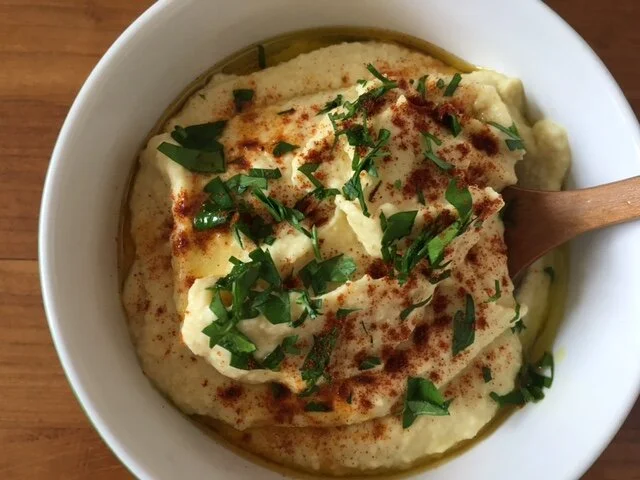
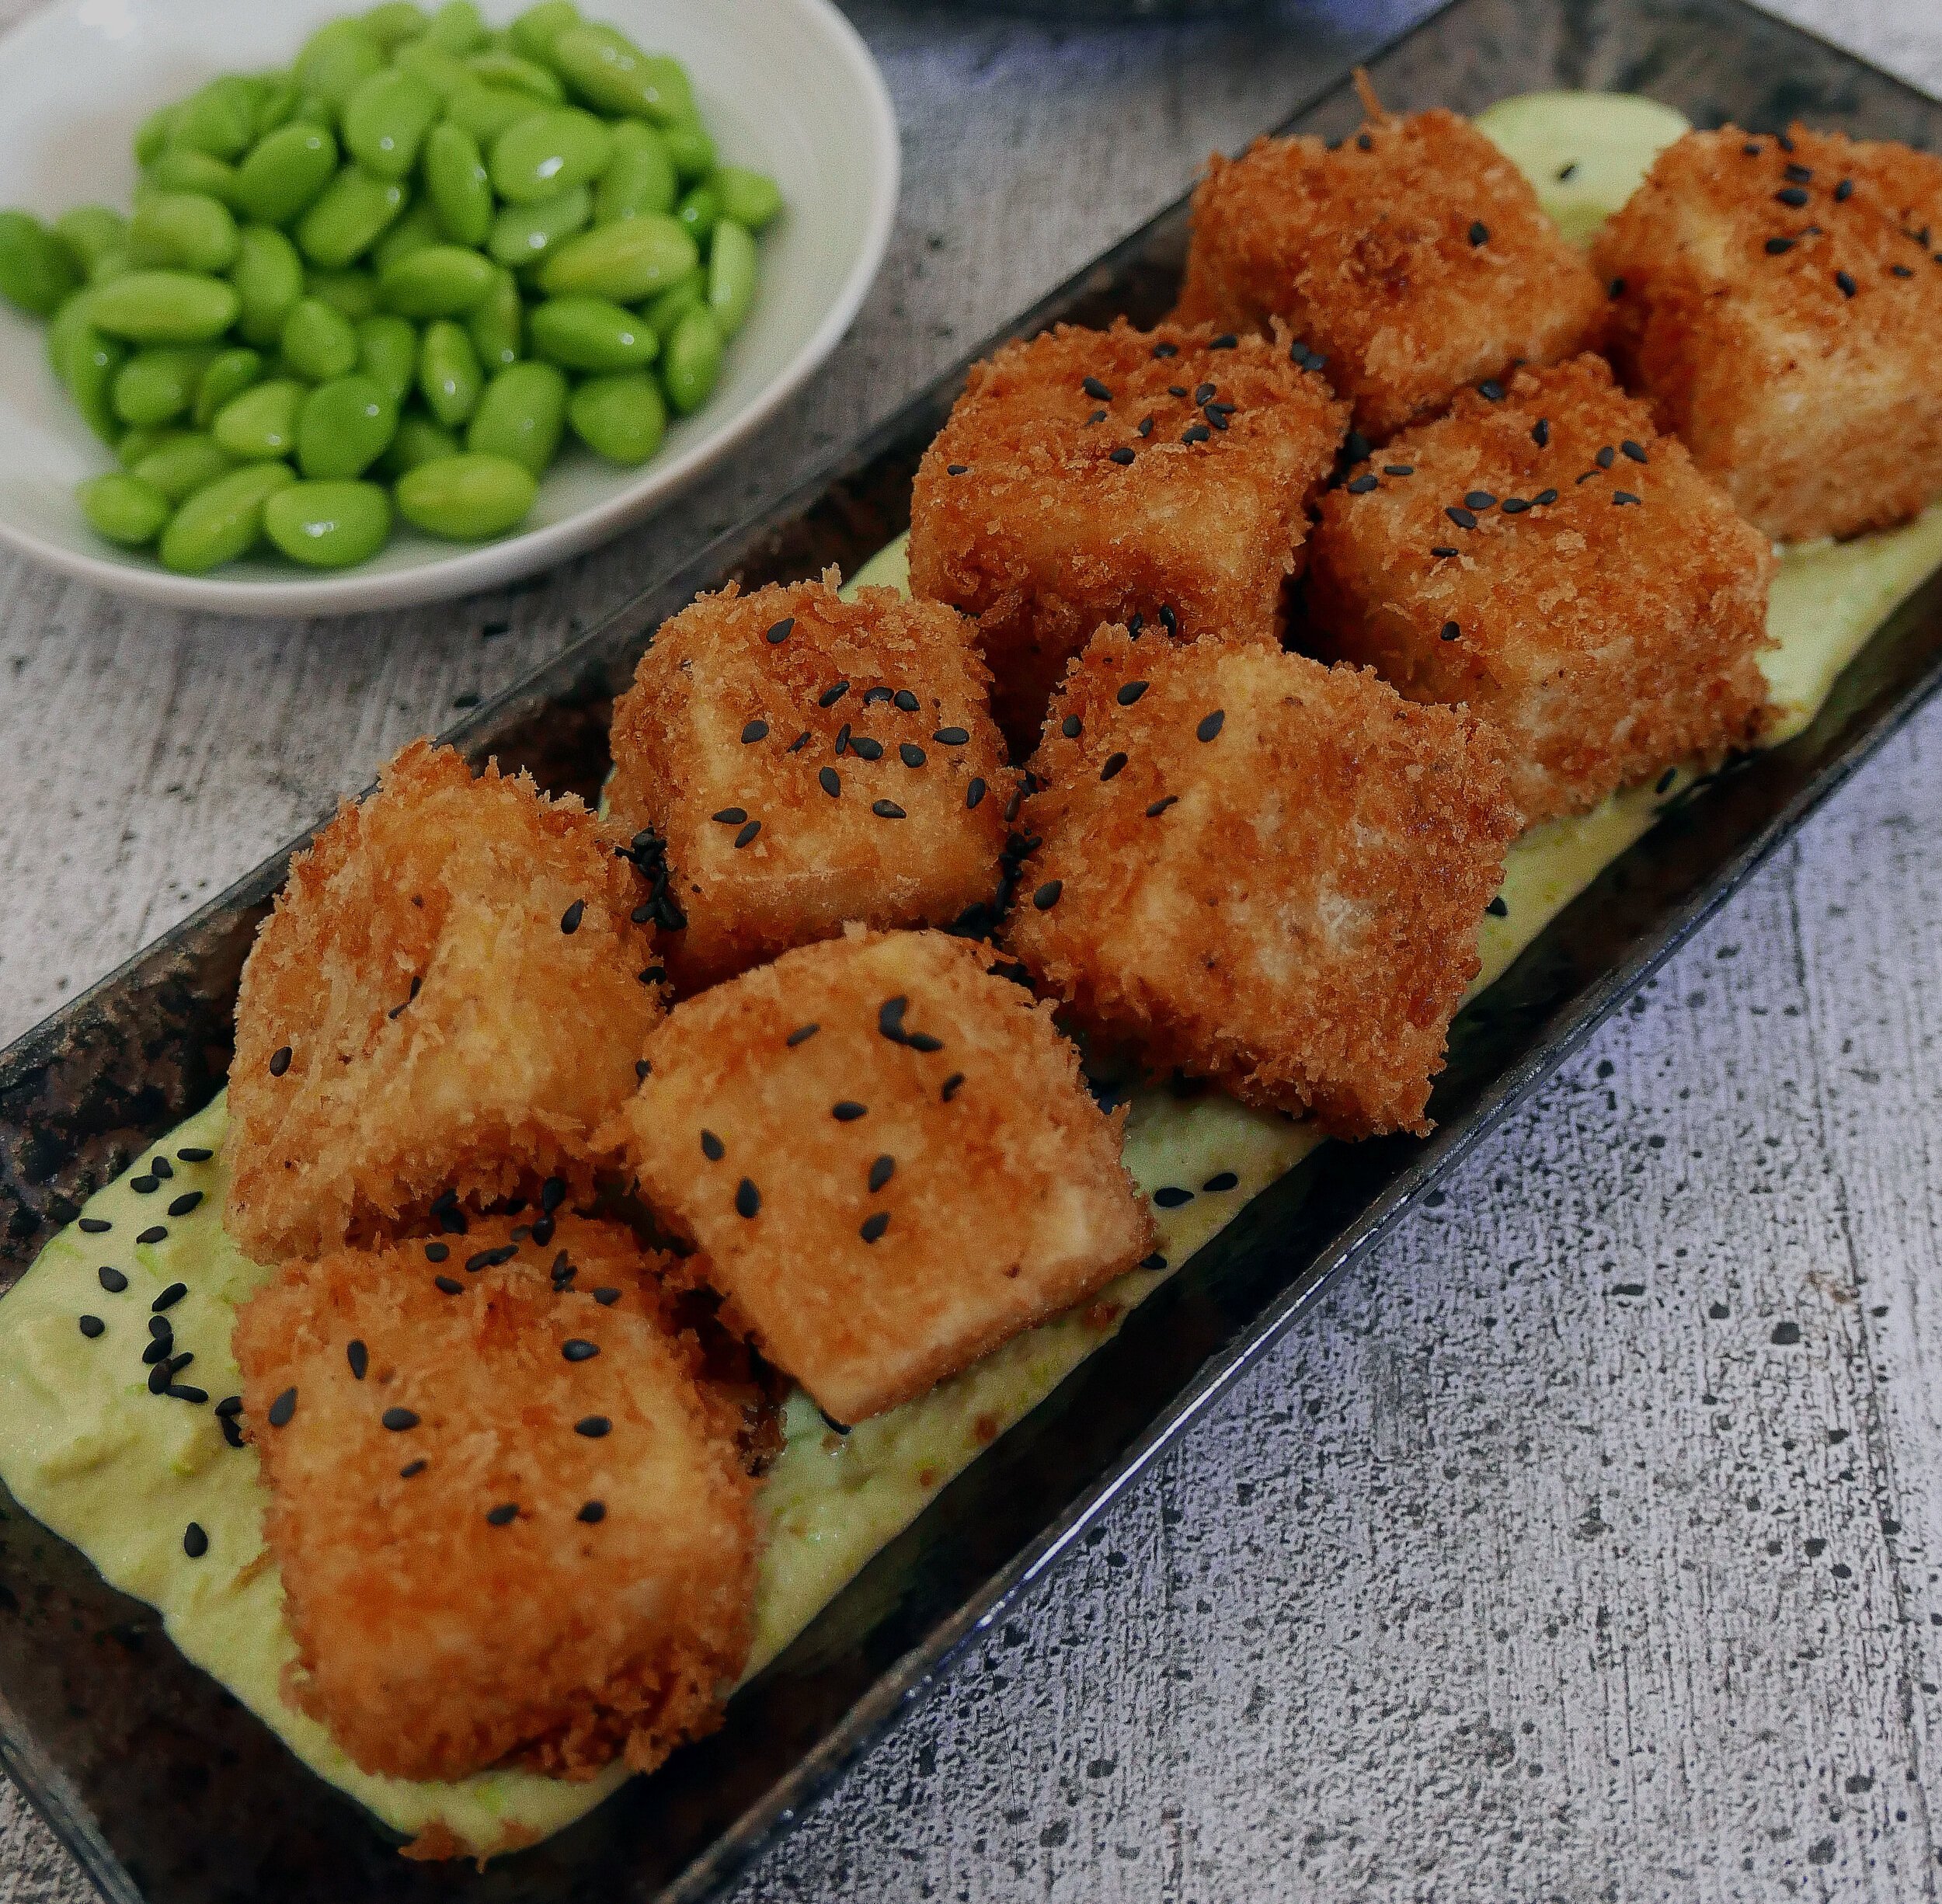
Panko Tofu with Edamame Hummus
The Recipe
Serves: 2-3 people
Preparation time: 20 minutes
Cooking Time: 20 minutes
In the 13th century, the Arabic cookbook "Kitab Wasf al-Atima al-Mutada" (The Description of Familiar Foods) described a dish similar to hummus made from chickpeas, vinegar, and spices. In the 16th century, the Turkish chef and traveler Evliya Celebi described a popular dish in Cairo made from mashed chickpeas and tahini.
I love hummus in any shape or form. It’s just such a great dip, spread or condiment found in various cuisines in the Mediterranean and the middle east. So why edamame hummus???
Despite my heritage, I really don’t cook much Asian food as I have essentially grown up with a ‘white’ palate. I had leftover miso and tahini so I thought I would make an Asian (ish) style version of one of my favourite dips.
Edamame finds its origins in China over 2000 years ago. They are essentially fresh soybeans and are commonly eaten in Japanese restaurants, steamed or boiled in the pod. Soybeans have provided the backbone for many Japanese delicacies such as miso paste and soy sauce for over 1,000 years. Eating edamame fresh and green started around the late 800s. The idea of eating soybeans fresh with a glass of cold beer is a tradition that has spread around the world and is a common, iconic dish in many Japanese restaurants. Edamame is usually found in the freezer section as once picked, they have quite a short shelf life. You can buy them in or out of the pods for convenience and depending on what you want to use them for.
It is a light, vegan dish that is great for communal dining and adds a nice spin to the original hummus made from chickpeas.
THE INGREDIENTS
Hummus
100g lightly blanched de-shelled edamame
10g tahini
15g white miso
50g apple cider vinegar
Half a clove of finely chopped garlic
100g olive oil
Panko Tofu
40g panko breadcrumbs
250g firm tofu
50g rice flour
4g shichimi togarashi*
2g sea salt
1 egg
Vegetable oil
THE METHOD
Blend all ingredients in a food processor until nice and smooth
If needed, add 25-50mls extra water to smooth out the hummus
Set aside while you make the tofu cubes
Cut the tofu into 1-inch cubes and set aside
Put the panko crumbs in a shallow bowl
Whisk the egg and also place in another bowl
Mix the shichimi togarashi, flour and sea salt and place in a bowl.
So, now you have your line up tofu cubes, seasoned flour, egg and finally panko crumbs
Toss the cubes in the flour, then egg and coat in panko crumbs. Set aside.
In a medium saucepan, fill up with the oil – deep enough to cover the tofu and allow to heat up to about 180’C. If you throw in some panko crumbs and they sizzle on impact, you are good to go.
Fry the tofu cubes until golden brown, and place on a tray with a paper towel to absorb any excess oil.
Schmear the hummus on a plate, top with the tofu and sprinkle with some black sesame seeds.
Let me know how you go with this recipe!!
* shichimi togarashi is a wonderfully bright, spicy and unique blend that can be sprinkled on ramen, steaks, salads and also this dish! It commonly is a mix of Japanese sansho pepper, black and white sesame seeds, ginger, nori and dried citrus peel
TRY SOME MORE MAIN RECIPES HERE
Quinoa Fishcakes with Mango Mint Dipping Sauce
The Recipe
Serves: 4 people
Preparation: 30 minutes
Cooking Time: 15-20 minutes
Quinoa is extremely versatile in cooking due to its texture and neutral flavour. You can create wonderful salads, risottos, porridges and even desserts that are vegan, gluten-free and high in protein.
Despite my fascination with quinoa, the growing popularity of it around the globe and the impact it has on the farmers in South America... I am actually not a big eater of the wonderful protein-enriched, neutral-tasting, trendy superfood.
However, quinoa is so amazingly versatile and can be used in sweet and savoury dishes that are gluten-free and high in protein.
With cooking, I try to challenge myself and also you, as my readers every day. To take classics and make them your own, make them current, seasonal and relevant to the region you live in. To use ingredients that you are unfamiliar with and to overcome your hesitation about trying something new.
In this recipe, the quinoa acts as a binder and gives texture to one of my favourite Thai street food snacks - fish cakes. Paired with a mint and mango dipping sauce on a peppery bed of crisp watercress. It's a little bit different from a quinoa kale salad.... try it out!
I think you are going to like it.
THE INGREDIENTS
Mango mint sauce
6 tbsp lime juice
100g mango flesh
6-8 mint leaves, finely sliced
2-3 chilli padi, finely sliced (to reduce the heat you can use regular red chillies)
5 tsp fish sauce
1 heaped tsp brown sugar
Fishcakes
250g white fish (seabass/tilapia/snapper)
60g dry quinoa
1 lime, zested
3g/ 3-4 kaffir lime leaves, finely sliced
45g/3 tbsp red curry paste
1tsp sesame oil
12g/5tsp fish sauce
6g/2tsp brown sugar
1 egg yolk
70g French green beans
Vegetable oil for frying
THE METHOD
Blend mango, browns sugar, fish sauce and lime juice together
Mix through sliced chilli and mint leaves
Add extra lime or sugar to taste.
Put quinoa in a saucepan and cover with salted water. Allow to boil until the germ ring has separated from the seed and it is soft in texture. Strain and rinse with cold water. Set aside and allow to drain.
Place all ingredients except green beans in a food processor and blend until combined.
Cut the tops and tails off the green beans and slice them into 1 cm pieces
In a medium bowl, mix fish mixture and cut green beans
Wet hands and mould small flat disks of the fish mixture (about 30g)
Heat 1 cm oil in a non-stick pan and fry the fishcakes, make sure you do not overcrowd the pan.
Cook on each side for about 1 minute or until golden
Place on a cooling tray or paper towels to drain out any excess oil
Serve on a bed of watercress with mango mint sauce
SOME MAIN RECIPES FOR YOU TO TRY OUT

