
explore the world through the universal language of food

Blueberry Crumble Muffins
Crispy and crumbly on top and deliciously moist inside. Make these super duper easy blueberry muffins
The Recipe
Makes: 12 medium muffins
Preparation: 15 minutes
Baking Time: 20-25 minutes
Muffins were developed around the end of the 18th Century. This is when pearlash, or potassium carbonate was adventurously added to a dough.

So in case you were unaware - there are two types of muffins in the baking world.
You have English style muffins which came about around 10th or 11th Century. They contain yeast, need a little time to rise and are cooked in a pan. These kind of muffins you will be wanting to slather some monkey nut butter on, top with salmon, poached eggs and hollandaise sauce and the like - yes those kind.
However... we are here talking about American-style muffins. The quick bread type, classified in that group along with scones.
Muffins were developed around the end of the 18th Century. This is when pearlash, or potassium carbonate was adventurously added to a dough. The leavening agent added carbon dioxide gas to the dough, allowing it to rise considerably and resulted in a lighter cakey texture. Pearlash was actually exported to Europe in large quantities until baking powder was developed commercially around the 1860's.
So with that little history lesson - let's move on to the recipe and discover how easy it is to make these delicious blueberry muffins. Get dirty and mix with your hands (that's what baking is all about!) and always be in a happy mood when you bake - believe it or not, this affects the end result.
INGREDIENTS
CRUMBLE
125g plain unbleached white flour
60g unrefined caster sugar
60g cold unsalted butter, cut into cubes
a pinch of salt
Combine all ingredients in a bowl and rub in the butter with your fingertips until a rough large bread crumb consistency. Refrigerate or freeze until ready to use.
MUFFINS
115g unsalted butter (at room temperature)
240mls whole fresh milk
2 medium eggs
400g plain unbleached flour
1 tbtbspaking powder
200g unrefined caster sugar
250g fresh or frozen blueberries
pinch of fine sea salt
METHOD
Preheat the oven to 180'C. Brush the muffin tin with butter and dust lightly with plain flour. Turn the tin upside down to remove excess flour. Place the prepared muffin tin in the fridge until the batter is ready.
Put flour, salt, baking powder, and sugar in a large mixing bowl
Add the cubed butter to the flour mix and rub in with your fingertips until you reach a fine breadcrumb consistency.
In a small mixing bowl or jug, add milk and eggs. Stir until combined and then add to the flour/butter mix. Stir until just incorporated.
Lastly add the blueberries and mix through until the fruit is evenly dispersed. Don't over-mix your muffin batter as the end muffin result will be a dry hard muffin.
Spoon the mixture into the prepared muffin tin which should be nice and chilled. Fill the holes right to the top of the tin. When the muffins rise they will spill over and create a lovely muffin top.
Finally add 2.5 tablespoons of the prepared crumble to the top of the wet muffin mix in the tins. Pack down lightly.
Bake for about 20-25 minutes (depending on the quality of your oven) until lovely and golden. Allow cooling slightly before turning them out onto a cooling rack.
Eat them fresh out of the oven with a good strong cup of coffee and you are ready to start your week!!!
Store in an airtight container for a few days or you can also freeze these muffins.
NOTE; you can make the crumble in advance and have it already frozen for when you have the urge to make crumble muffins or a basic fruit crumble. Add any fresh or frozen fruit to this recipe if you are not too partial to blueberries.


English Tea Scones for Merienda
The Recipe
Makes: 12 x 50g scones
Preparation: 10 minutes
Baking Time: 12-15 minutes
The perfect cream scones for afternoon tea - clotted cream and strawberry jam is a must!

We all know about the age old tradition of afternoon tea in the United Kingdom.. consisting of cream scones, cute little crustless sandwiches and loose leaf tea... It is a tradition that was common amongst the upper-class societies in the 1800s and was a light meal, served between 4 and 6.
The tradition of this afternoon tea today is prevalent throughout the world with hotels and established restaurants offering this in-between meal that can be most opulent.
It is also a big tradition in Argentina, which is a reminder of the migration of British citizens to the country between 1837-1901. This was the Victorian Era when Argentina had gained independence from Spain and at the time it was an informal empire of the United Kingdom due to economic influences.
The immigrants to Buenos Aires in particular were industrialists and potential landowners who established their cultures with sports clubs (Cordoba Athletics Club, The Hurlingham Club), Harrods in 1912, and afternoon tea, known as Merienda consisting of baked goods, mate (an infusion of ground leaves and stems from the yerba mate shrub), coffee and always, always, dulce de leche.
A super easy recipe for these traditional scones (Skones or Skons, however, you want to pronounce it).
Enjoy crumbling in the flour and butter between your fingertips (my favourite bit), and of course.. eating them!
INGREDIENTS
260g plain flour
Pinch of fine sea salt
30g caster sugar
15g baking powder
120g unsalted butter, cubed
110g cream
1 Egg yolk (brushing on top)
METHOD
Preheat the oven to 200’C
Whisk the flour, salt, sugar, and baking powder
Rub in the cold butter to coarse breadcrumb consistency
Stir through the cream until the dough comes together
Cut/shape the scones into 50g pieces. It should be about 2.5cm thick before baking. If you don't want to weigh the scones - that's fine with me. You can even use cookie cutters to create different shapes if your heart desires so.
When shaped, place onto a lined tray and brush with egg yolk. Bake for 12-18 minutes until golden brown. Cool on the tray for 5 minutes before transferring them to a cooling rack
It is most important to eat scones slightly warmed, with clotted (or thick double) cream and always good strawberry jam.
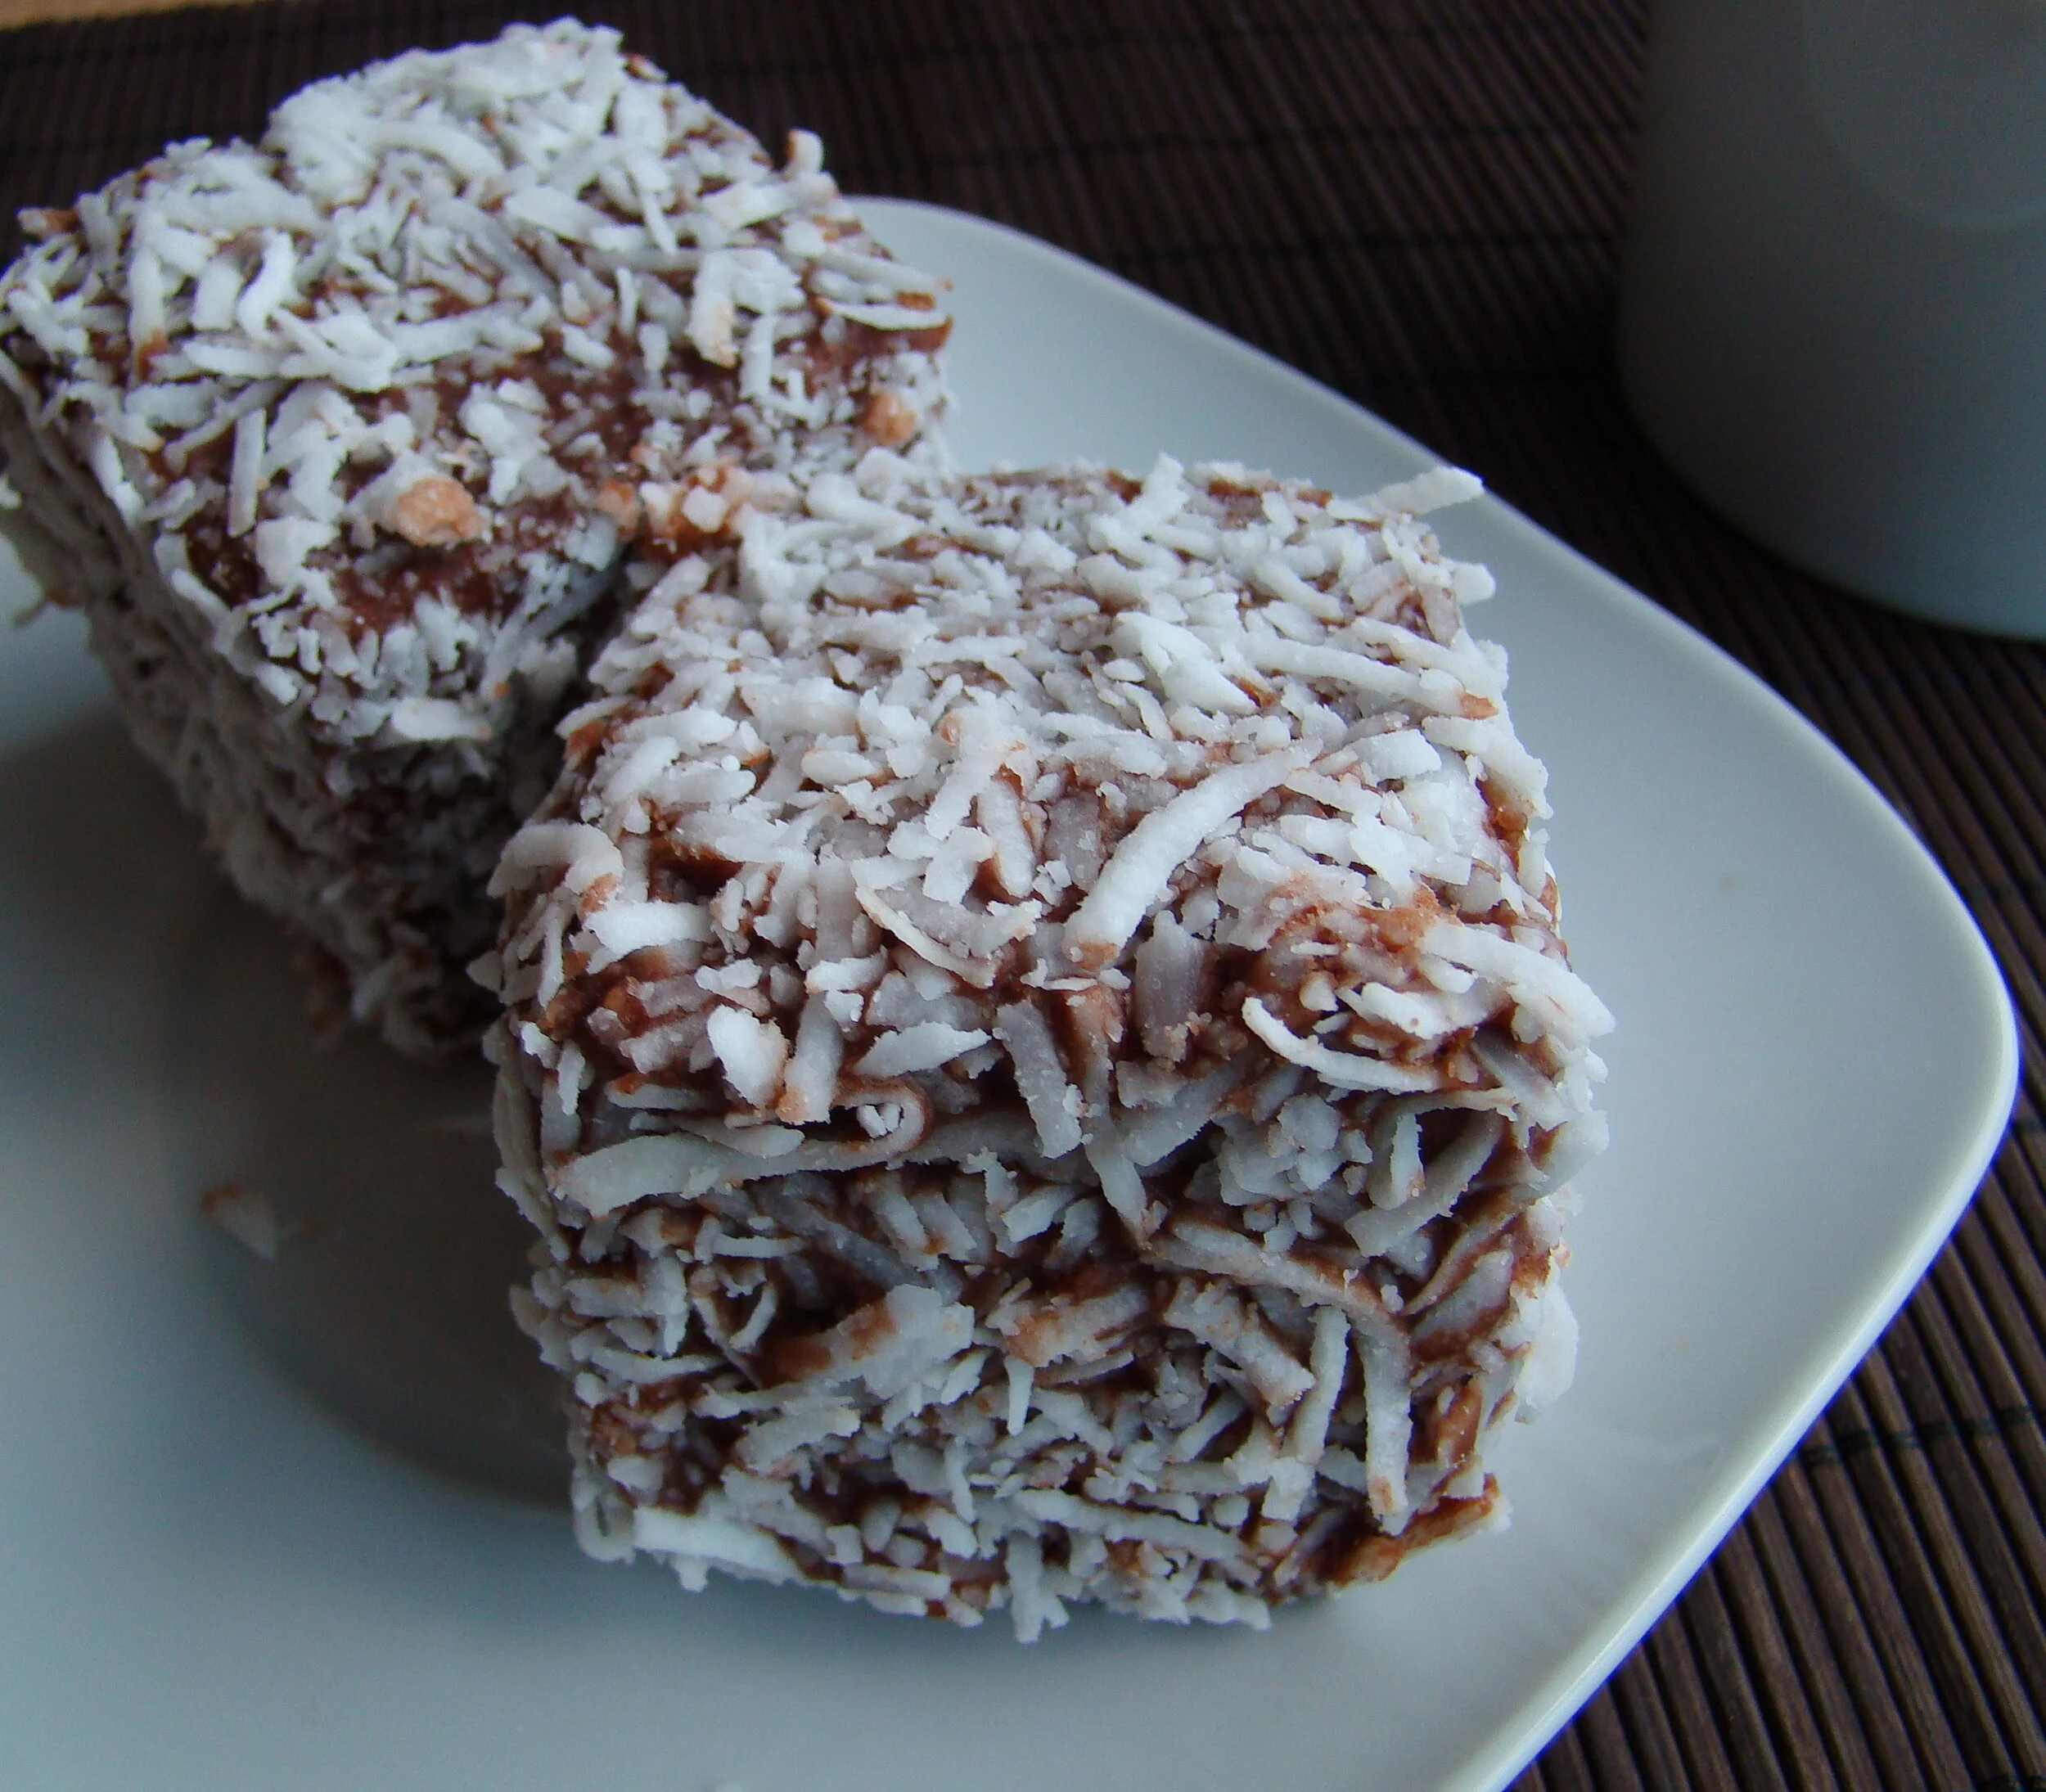
Lamingtons for Milo
The Recipe
Makes: 12 medium lamingtons
Preparation: 30 minutes
Baking Time: 20-30 minutes
Supposedly named after Lord Lamington, the governor of the northern state, Queensland in the late 1800s these little vanilla cakes rolled in chocolate and coconut have become a cake that one either loves or hates.

I don't think that there are many foods that are iconic to Australia. Sure, we have pavlova, meat pies, sausage rolls and hamburgers with egg, canned beetroot, and pineapple, amazing seafood and then we have lamingtons.
Supposedly named after Lord Lamington, the governor of the northern state, Queensland in the late 1800s these little vanilla cakes rolled in chocolate and coconut have become a cake that one either loves or hates.
I remember the lamington drives when I was in primary school. The school would order a massive amount of artificial looking and tasting blocks of stale cake squished together with stark white cream and a small slathering of jam that resembled a little bit of a strawberry flavour. We raised quite a bit of money for these drives; however, the memory of those artificial cakes left a bad taste in my mouth....
Fast forward, to Singapore, in 2012. I was a proud owner of a cafe where I served just as many Australian ex-pats as I did local Singaporeans. It was here I started making my version of lamingtons. using fresh cake, good vanilla, and quality chocolate. Baking a batch at 5am, ensured a sell-out by 10am.
Fast forward, to Mexico, in 2014. A bright young Canadian Mexican graced us with his ever-enthusiastic presence and questioned me... "Do you know how to make lamingtons?", I sure do.
INGREDIENTS
CAKE
260g all-purpose flour
2 tsp baking powder
¼ tsp salt
113g butter unsalted (room temperature)
150g caster sugar
100mls milk
2 medium eggs (50g in weight each) @ room temperature
1 tsp good vanilla extract or ½ tsp vanilla bean paste
ICING
454 g icing sugar
30g cocoa (sifted)
42g salted butter
120 mls milk (4oz)
100g desiccated coconut
METHOD
Preheat the Oven to 180’ Celsius and grease and line with baking paper a 20cm square pan.
Beat butter, vanilla & sugar together until smooth and creamy.
In a separate bowl, sift flour & baking powder.
Add eggs to the butter mixture one by one
Add 1/3 of the flour and 1/3 of the milk and mix. Continue doing this until all the ingredients are used up, ending with the flour.\
Spoon into the pan and level off with a spatula.
Bake in the preheated oven for about 20-30 minutes. When a skewer is inserted into the centre of the cake it should come out clean.
Allow the cake to cool completely then wrap it in cling film and refrigerate overnight.
Once the cake is set and nice and firm, cut it into even squares.
Over a double boiler on medium heat, mix all ingredients (except the coconut) until melted and combined
Put the coconut in a separate bowl.
Take a square of the vanilla cake and dip it into the chocolate mixture until completely covered. Next roll the square in the coconut.
Place on a cooling rack to set
*The cake can be refrigerated for up to 3 days. If not used right away it can also be frozen and then defrosted (room temperature)

Chocolate Glazed Doughnuts - and a Vanilla Milkshake
The Recipe
Makes: 16 x 60g doughnuts
Preparation: 30 minutes
Cooking Time: 10 minutes
Baroness Elizabeth Dimsdale who was the wife of Baron Thomas Dimsdale, a smallpox pioneer, compiled a recipe book in the 1800s containing a recipe by a local cook that made 'dow nuts' which were pieces of dough cut into the size of nuts, fried in pork lard.

Despite doughnuts being a modern-day American symbol of gooey, sweet goodness that can be eaten at any time of the day, the humble doughnut finds its origins not from the Dutch but from a home cook residing in Hertfordhire, England.
Baroness Elizabeth Dimsdale who was the wife of Baron Thomas Dimsdale, a smallpox pioneer, compiled a recipe book in the 1800s containing a recipe by a local cook that made 'dow nuts' which were pieces of dough cut into the size of nuts, fried in pork lard.
Before the 1800's there is also evidence that of variation of doughnuts were dabbled with, excluding eggs. The Romans ad Greeks used to fry pastry dough and drizzle it with honey or syrup and the Germans used to stuff the doughnuts with savoury ingredients at a time when sugar was scarce.
It is said that the Dutch Immigrants brought their 'oliekoeks' (oily cakes) to Manhattan (New Amsterdam) in the early 1800's. In the mid-1800's, Elizabeth Gregory, mother to a New England ship captain made fried dough for her son and crew for their long voyages. Her son claim that it was his invention of the whole inside the doughnut, but nobody really knows.
Either way, doughnuts evolved into an American staple, so much so, they were eaten by the troops in France during the first World War. Doughnuts were big in the states and mass production of these fried doughy sweets began when Adolph Levitt, a Russian refugee inveted the first doughnut machine in the 1920's.
The wholly sweet dough is an indulgent snack and breakfast.... I upped the indulgence scale by throwing in a vanilla bean milkshake... I hope you enjoy making these doughnuts as much as I did and learned a little bit of food history on the way!
INGREDIENTS
DOUGHNUTS
14g instant yeast
60mls warm water
325 mls milk (don't even think about using light milk)
2 medium eggs (they should be around 50g-55g each)
100g fine caster sugar
1/2 tsp salt
70g unsalted butter (melted)
625g plain flour
oil for deep frying
CHOCOLATE GLAZE
200g unsalted butter
40g good cocoa powder
100g icing sugar
70g milk
METHOD
In a mixing bowl, sprinkle yeast over water and allow to stand for 5 minutes
With the paddle beater attachment, add the sugar, milk, salt, eggs, and half the flour. Once the ingredients are incorporated, mix in the melted butter and the rest of the flour.
Knead the dough with dough hook or if you feel like a workout, by hand until nice and smooth.
Place in a well-oiled bowl and cover with cling film or a damp cloth. Allow the dough to double in size.Once the dough has doubled, take out all your anger and punch down the dough. Knead lightly on a well-floured surface and use a round cookie cutter about 8 cm in diameter to cut out your shapes. Dip your finger in flour and poke in the centre of the cut circle, move it around and around so a hole is formed.
Heat a good amount of oil for deep frying at 180'c/360'f. If you don't have a thermometer, throw a small piece of dough into the oil to see if it is ready. Place the dough onto a slotted spoon and carefully into the oil.
Fry the doughnuts on one side and then flip them over. They should be a nice golden colour. Take out the doughnuts and place onto a cooling rack and allow them to chill for a bit before dunking them in some chocolate glaze.
For the chocolate glaze, over a low heat, melt butter and whisk in cocoa, icing sugar and milk until smooth.
Allow to cool slightly. Dunk one side of the doughnuts into the velvety glaze, turn the right way up and place back on the cooling rack. Let the excess chocolate glaze drip down the sides and allow them to set slightly before dunking them in your very vanilla milkshake.
MILKSHAKE - serves 1!
A milkshake is a wonderful thing. It is so simple to make but you really can get it wrong by using artificially flavoured ingredients.
80g fresh full-fat milk
1/2 tsp good vanilla bean paste or extract (Use an artificial vanilla flavouring and you will regret it)
180g good vanilla ice cream
Blend together and pour into a chilled glass.

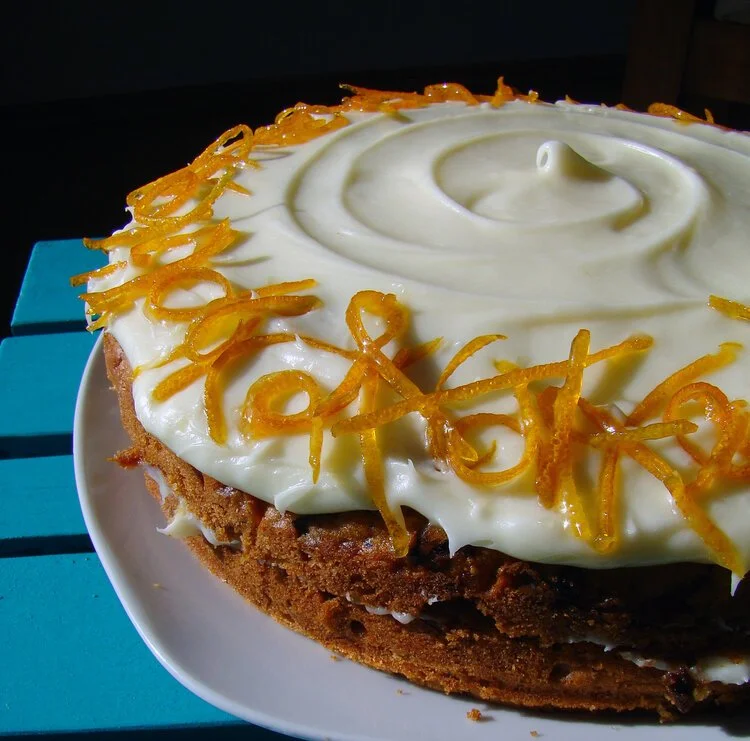
Classic Carrot Cake with Cream Cheese Frosting
The Recipe
Makes: 1 x 20cm cake
Preparation: 20 minutes
Baking Time: 45 minutes
A classic carrot cake with a sprinkling of candied orange peel to decorate the rich cream cheese frosting
Brownies last week and today, pastel de zanahoria or carrot cake. It appears to be birthday month in Mexico and I love having the excuse to bake like nobody’s business.
It’s an oldie, a goody and a classic. If you consume a dry carrot cake – there is something very wrong.. it has either been in the oven for a good few hours, the recipe has too much flour or not enough carrot. I’ve tried thousands of carrot cake recipes and eventually came up with this one. In all of my cakes I use butter but traditionally the carrot cake was supposedly born in the United States, hence the use of oil, however Britain claims some of the fame during rationing of food in the second world war. Whoever invented it and for whatever reason, this cake is always a crowd-pleaser.
You can use olive oil if you like but the flavour will be super strong. Use a neutral-tasting oil such as sunflower if you want to taste the carrots and spices rather than the oil.
INGREDIENTS
CAKE
4 medium eggs
150g muscovado sugar
150g sunflower oil
350g peeled and grated carrots
300g unbleached wheat flour
1.5 tsp baking powder
1tsp ground cinnamon
1/2 tsp ground ginger
1/2 tsp ground cardamom
80g toasted pecans roughly chopped
80g dark raisins (the juicer the better)
fine zest of 1 orange
dash of vanilla
FROSTING
125g unsalted butter, softened
200g icing sugar, sifted
250g of softened cream cheese
juice of half an orange
CANDIED ORANG PEEL
1 large orange, nice and bright and preferably wax free
100g unrefined sugar
100g water
METHOD
Grease your pan!! If it is a fairly good pan, you can do without lining the sides but always line the base of your pan to prevent it from sticking. You want to use a round 23cm springform pan. It is best. If you use a smaller-sized pan – the cooking time MAY increase, depending on how good your oven is.
Preheat oven to 180’C.
Crack the eggs in a bowl and add the sugar. Whisk and whisk and whisk if you don’t have the privilege of owning a kitchen aid (or if you are me, longing to pick up my kitchen aid from a friend babysitting it in Singapore). So you want to whisk it until it changes colour and thickens slightly.
Toast the pecans in a pan or in the oven. Allow to cool slightly and roughly chop.
Grate the carrots and put aside with the nuts and raisins. We will add all of these together soon!
Add the oil and whisk more, throw in the vanilla while you are at it at this stage.
Sift in the flour, spices, salt and baking powder. Mix until all combined.
Now add the chunky ingredients (raisins, carrots and nuts) and fold in nicely.
Pour the batter into the pre-greased tin and bake for a good 40-60 minutes (mine is a gas oven so it takes a little longer. You should know the temperament of your own oven so gauge it within this time frame)
Remove and allow to cool in the tin for about 5 minutes. Unmould and turn out onto a cooling rack. Allow the cake to cool completely before icing.
Make sure both butter and cream cheese are at room temperature and are quite soft. If one is colder than the other, the fat in the product will seize and you will get a lumpy texture.
Mix both butter and cream cheese really well until nice and smooth. Incorporate the juice and finally, bit by bit, sift in the icing sugar. The texture should be smooth and the consistency should not be too runny. If so, feel free to sift in more icing sugar to thicken it up. You will get a good workout if you do this by hand but I advise you to use an electric mixer if you have one to achieve a fluffier frosting.
You can choose to ice just the top of the cake or if you want a little bit more work to do, you can slice the cake in half, slap on some frosting midway, sandwich it and pop the rest on top.
It’s your cake, do whatever you want!
Pop the water and sugar in a saucepan and stir a little. Zest the peel of the orange and then add it to the sugar mixture. Boil until the liquid has become a toffee consistency and the liquid has pretty much evaporated. Allow to cool at room temperature or to speed up the process – throw it in the fridge.
The strands should be nice and crunchy. Place on top of the frosting however your heart desires.
I hope you enjoy baking, assembling, decorating, and eating this cake as much as I did.